Please Choose Your Language
Views: 0 Author: Site Editor Publish Time: 2025-09-09 Origin: Site
Pick a random orbital polisher for most jobs. It is safe and works well for beginners.
Always wash the car before you start polishing. This stops dirt from making scratches while you work.
Look at the paint for any problems before you polish. This helps you pick the right pad and compound.
Split the car into small parts when you polish. This makes sure you cover everything and get better results.
Take care of your buffer polisher often. Clean the pads and check for damage to keep it working well.
There are different polishers you can use for cars. The random orbital polisher is very popular. It moves in two ways at once. This helps stop paint from burning. It is safer for beginners. Rotary polishers spin in one direction. They fix tough paint problems. But they can get too hot. If you are not careful, you might hurt the paint. Some dual action polishers mix rotary power with random orbital safety. You get strong results and protect the surface.
Tip: Pick a random orbital polisher for most jobs. It is safe and simple to use.
Big polishers like disc and five-axis machines work best on metal. These machines are fast and give a smooth finish. You do less work and get better results. For car paint, use a random orbital polisher. It is easier to use on curves and small spots.
Pads are important for your random orbital polisher. Heavy cutting pads fix deep scratches. Medium pads fix normal problems. Finishing pads make the paint shiny and smooth. Pads can be soft or strong. Microfiber pads with short fibers cut more. Long fibers are better for finishing. Using the wrong pad can cause tiny marks on soft paint.
Pad Type | Recommended Use | Softness/Cutting Ability |
|---|---|---|
Heavy Cutting Pad | Hard or damaged paints | High cutting ability |
Medium Cutting Pad | Average defects | Moderate cutting ability |
Finishing Pad | Final finishing stage | Low cutting ability, soft finish |
Note: Always pick the right pad for your random orbital polisher and the job.
Buffing compounds help your random orbital polisher and pads fix paint. Use coarse compounds for deep scratches. Use polishing pastes for a shiny look. The grit you pick changes the finish. New compounds use nanotechnology. They fix paint better and keep it safe. For metal, use strong compounds. For car paint, use gentle ones with your random orbital polisher and dual action movement.
Test your compound and pads on a small spot first. This helps you avoid problems.
You must clean the car before you polish the paint. Dirt, tree sap, bugs, and brake dust can hide problems. These things also make polishing harder. Follow these steps to get rid of everything:
Rinse the car to remove loose dirt and dust.
Use a chemical cleaner like SONAX Fallout Cleaner. Spray it on cool paint. Wait for 3-4 minutes. Rinse it off with water.
For tough spots, use a clay disc and clay lubricant. This step takes off paint marks, overspray, and other problems.
Wipe the paint with a microfiber cloth. This gets rid of any leftover stuff.
Tip: Always read the instructions on your cleaning products. If you use an all-purpose cleaner, test it on a small spot first. This helps you avoid stains.
After cleaning, you need to check the paint for scratches and swirls. Good lighting helps you see every detail. Walk around the car and look at the paint from different sides. You might see deep scratches, water spots, or faded paint that need extra care.
"The first step is to inspect the paint. This important part means looking closely at the car’s paint in different lights. You want to find swirl marks, scratches, faded spots, and water spots."
Find all the problems before you start polishing. This helps you pick the right pad and compound for each spot. Most swirls and light scratches will go away after polishing. Some deeper marks may need more work.
Masking keeps parts of your car safe from polish. Use automotive masking tape to cover trim, panel gaps, and cracks. This stops polish from getting stuck in hard places. It also keeps you from making mistakes.
Mask off nearby spots to stop contamination.
Cover panel gaps and cracks so dried polish does not collect.
Protect against spray and splatter from the buffer.
Taking time to mask these areas helps you avoid new problems. It also makes your detailing job look neat and professional.
Before you start the polishing process, you need to set up your workspace for safety and efficiency. A clean and organized area helps you focus on the job and avoid mistakes. Here are some steps to follow:
Wear gloves, goggles, and a mask to protect yourself from chemicals, dust, and noise.
Clear your workspace of any obstacles. This keeps you safe and gives you room to move the detail buffer polisher around the car.
Make sure the area has good ventilation. Fresh air helps you avoid breathing in fumes from polish or compounds.
Use bright lighting. Good lights help you spot imperfections and see how well you remove imperfections during the polishing process.
Tape off trim, emblems, and panel gaps. This protects sensitive areas from polish splatter and keeps your work neat.
Tip: Always inspect your detail buffer polisher and pads before you begin. Replace any worn or damaged parts to avoid problems during the polishing process.
You need to apply polish the right way to get even coverage and the best results. Start by shaking the polish bottle well. Place a few small drops of polish onto your pad. Spread the polish on the paint surface before turning on your detail buffer polisher. This step helps prevent splatter and makes the polishing process smoother.
Use a forced random orbital polisher or a random orbital polisher for even results.
Hold the polisher flat against the paint. This keeps the pad in full contact with the surface.
Work the polish into the paint using slow, overlapping passes. Move the polisher in straight lines, not circles.
Keep the speed steady. Do not rush. A slow arm speed helps you remove imperfections and avoid missing spots.
Note: If you use too little polish, the pad can dry out and scratch the paint. If you use too much, the pad can clog and reduce the effectiveness of the polishing process.
You get the best results when you divide the car into smaller sections. This method helps you focus on one area at a time and ensures you remove imperfections evenly.
Divide the car’s surface into sections about 20 inches by 20 inches. This size is easy to manage with a detail buffer polisher.
Start at the highest point of the car and work your way down. This keeps dust and polish from falling onto areas you have already finished.
Count your passes aloud as you polish each section. This helps you keep track and ensures you do not miss any spots.
Use a forced random orbital polisher for tough areas. It gives you more power to remove imperfections without damaging the paint.
After every couple of panels, replace your pad. Clean the pad after every few sections to keep the polishing process effective.
"When polishing paint, it’s hard to know how long you should be polishing to get good results. To keep track, I divide my movements across the paint surface into section passes that I count aloud as I buff."
Common challenges for beginners include working on areas that are too large, moving the polisher too fast, or using the wrong speed setting. You can avoid these problems by shrinking your work area, using a slow arm speed, and adjusting the speed of your forced random orbital polisher as needed. Apply enough pressure to engage the pad, but not so much that the pad stops rotating.
After you finish the polishing process, you need to check your work. Walk around the car and look at the paint from different angles under bright light. Look for any spots where you did not remove imperfections or where the finish looks uneven.
Wipe the surface with a clean microfiber towel to remove any leftover polish.
Inspect the paint for swirls, scratches, or haze. If you find any, repeat the polishing process on those spots.
Make sure all masked areas are clean and free of polish residue.
Tip: A forced random orbital polisher helps you achieve a flawless finish and makes paint correction easier. Take your time during the final inspection to ensure your car looks its best.
By following these steps, you use your detail buffer polisher to remove imperfections and achieve professional-level paint correction. The right polishing process, combined with careful technique and the right tools, gives your car a smooth, shiny finish.
You want your buffer to deliver a flawless finish every time. Many people make common mistakes during detailing. You can avoid these problems by following expert advice:
Prepare the paint surface before you start. Wash, clay bar, and dry the car to prevent swirl marks.
Match the pad and product for your buffer. Using the wrong pad or compound can cause micro-marring or poor results.
Use light to medium pressure. Let the buffer do the work. Pressing too hard or too soft can damage the paint.
Move the buffer at a slow, even speed. Work in small sections for better control.
Inspect your work often. Do not over-polish. Too much polishing can harm the paint.
Polishing tips: Always do a test spot before you begin. This helps you choose the right pad and product for your buffer.
Taking care of your buffer keeps it working well for all your detailing and paint correction jobs. Regular maintenance helps you get professional auto detailing results. Here are some easy steps:
Wipe the buffer with a clean microfiber cloth after every job.
Remove and wash the pads with warm soapy water. Let them air dry before the next use.
Check the backing plate for cracks or damage. Replace it if needed.
Clean the exterior of your buffer with a soft brush or cloth.
Inspect the carbon brushes for wear. Replace them if necessary.
Maintenance Practice | Description |
|---|---|
Clean After Each Use | Remove polish residue, dust, and debris from your buffer. |
Inspect and Lubricate Parts | Check for wear and lubricate moving parts as the manufacturer recommends. |
Store Properly | Keep your buffer in a dry, clean place away from sunlight and moisture. |
Replace Worn-out Parts | Change pads, backing plates, or accessories when they show signs of wear. |
Tip: Regular cleaning and inspection help your buffer last longer and perform better during detailing.
Using a buffer for waxing saves you time and effort. You can finish professional auto detailing jobs faster and get a better shine. Here is a quick comparison:
Waxing Method | Time Required |
|---|---|
Hand Waxing | 45-90 minutes |
Machine Waxing | 30-45 minutes |
You can see that a buffer cuts waxing time almost in half. The buffer spreads wax evenly and helps you achieve a smooth finish. You get consistent results and protect your car’s paint with less work.
You should polish your car one or two times a year. Good washing and drying techniques help keep the finish looking great between detailing sessions.
You can get a perfect finish if you follow these steps. First, put on the right backing plate. Make sure your pad is in the center. Add polish to the pad. Work on small areas at a time. Use light pressure when you polish. Overlap your passes so you do not miss spots. Using a detail buffer polisher often helps your paint last longer. It makes your car look shiny. It also helps your car keep its value.
Benefit | Description |
|---|---|
Improves paint longevity | Keeps paint strong and helps it last longer |
Enhances visual appeal | Takes away flaws and makes paint shine brighter |
Increases resale value | Makes your car look new and worth more |
Protect your polished paint with car wax or ceramic coatings. These products block UV rays, water, and dirt. They make cleaning your car easier. Your car will look great every time you drive!
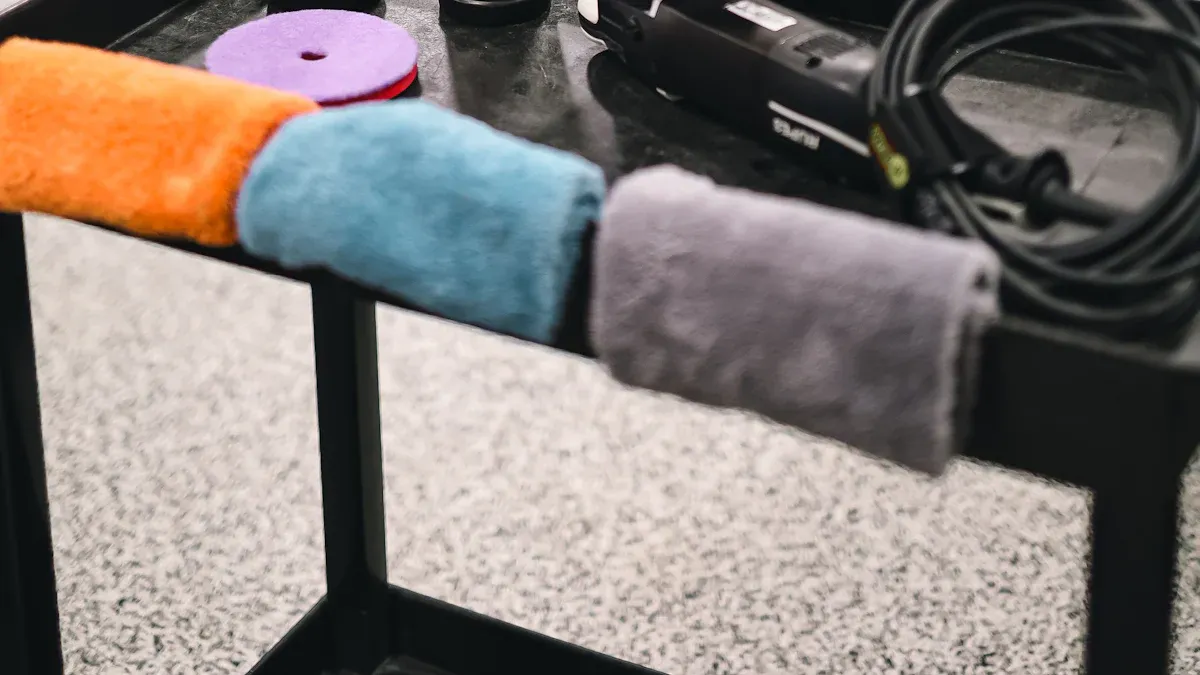
You should change pads when you notice a drop in results or see excess residue on the surface. Clean pads after every few sections. Fresh pads help you get better results and protect the paint from scratches.
You should use separate pads for each compound. Mixing compounds on pads can affect results and damage the paint. Label your pads to avoid confusion. Clean pads after each use for the best results.
Polishing pads remove defects from the paint surface. Finishing pads create a smooth, glossy look. Use polishing pads for correction and finishing pads for shine. Choosing the right pads helps you achieve professional results.
You should use gentle pads and the correct compound for your paint surface. Avoid pressing too hard. Work slowly and check results often. Protect the clear coat by using pads designed for delicate surfaces.
Results depend on the type of paint, pads, and the condition of the surface. Hard surfaces need stronger pads. Softer surfaces require gentle pads. Always test on a small area to see how the surface reacts.